You tap Remove BG → Auto removal, wait for the spinner, and get… a mess. Or nothing. Or — the genuinely infuriating version — a perfect cutout in the preview window that falls apart once you export.
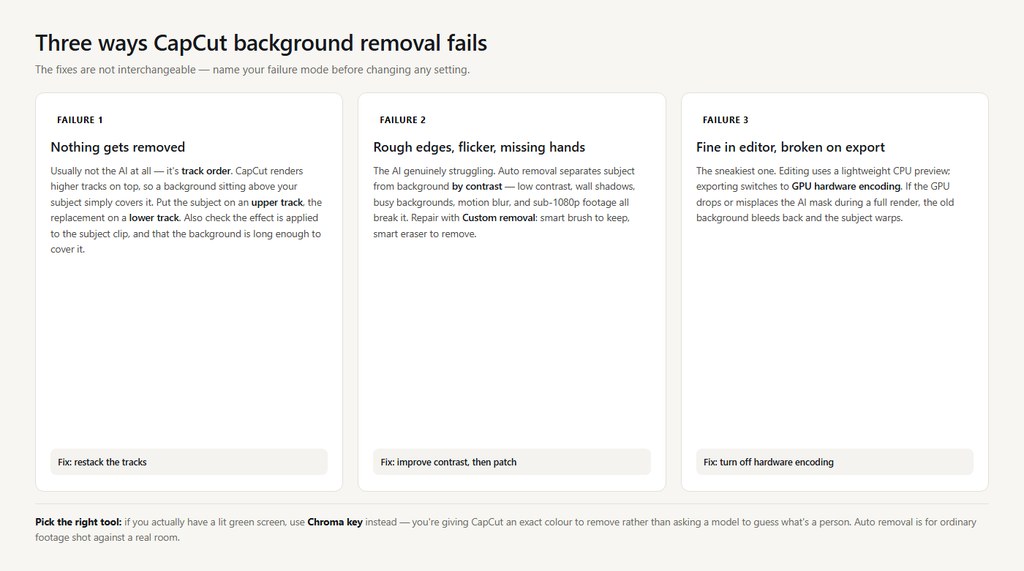
Those three failures have three completely different causes, and fix attempts are not interchangeable. Figure out which one you have before you touch a setting.
Failure 1: Nothing gets removed at all
Nine times out of ten this isn’t the AI — it’s your track order.
CapCut renders higher tracks on top of lower ones. If your new background is sitting above your subject clip, it will simply cover everything, and the removal will look like it did nothing. Put the clip you want to keep on an upper track, and the replacement image or video on a lower track beneath it. That’s the whole mechanic.
Two related checks:
- Make sure the effect is applied to the right clip. Auto removal belongs on the subject clip, not on the background clip. It’s easy to select the wrong one when both are stacked.
- Make sure the background clip is long enough. If your replacement media is shorter than the subject clip, the background vanishes partway through — which reads as “the remover stopped working.”
If the tool itself is greyed out or missing, you’re on an old build. Update CapCut. On desktop, the current path is: select the clip → Video → Remove BG → Auto removal.
Failure 2: Rough edges, flickering outline, missing hands
This is the AI genuinely struggling, and the cause is almost always in the footage rather than in CapCut. Auto removal is a segmentation model — it separates subject from background by contrast. Anything that reduces contrast breaks it.
- Low contrast between you and the wall. Wearing a grey hoodie against a grey wall is the classic failure. Change clothes or change the background.
- Shadows behind you. The model often reads a hard shadow as part of the subject. Light the background separately from your face, or stand further from the wall.
- Busy backgrounds. Bookshelves, plants, patterned wallpaper — clutter gives the model edge after edge to guess at.
- Motion blur. Fast hand movements produce frames with no clean boundary to find.
- Low resolution. 1080p is the practical floor for usable cutouts; 4K gives the model meaningfully more to work with.
Shoot for the tool and the tool works: even lighting, a plain background, a few feet of separation, clothing that contrasts, and a camera that isn’t moving.
Repair a bad cutout with Custom removal
When auto removal is mostly right, don’t start over. Switch to Video → Remove BG → Custom removal and patch it:
- Smart brush — paint over areas that should stay (hands, hair, a prop you’re holding).
- Smart eraser — remove leftover background patches.
- Simple eraser — clean up remaining edges manually.
Zoom in on the preview while you work. Hair is the hardest case for every background remover on the market; if the edge is bad, switching to a background of similar brightness hides imperfections far better than endless brushing.
Failure 3: Fine in the editor, broken after export
This one has a specific and slightly unintuitive cause: GPU hardware encoding desync.
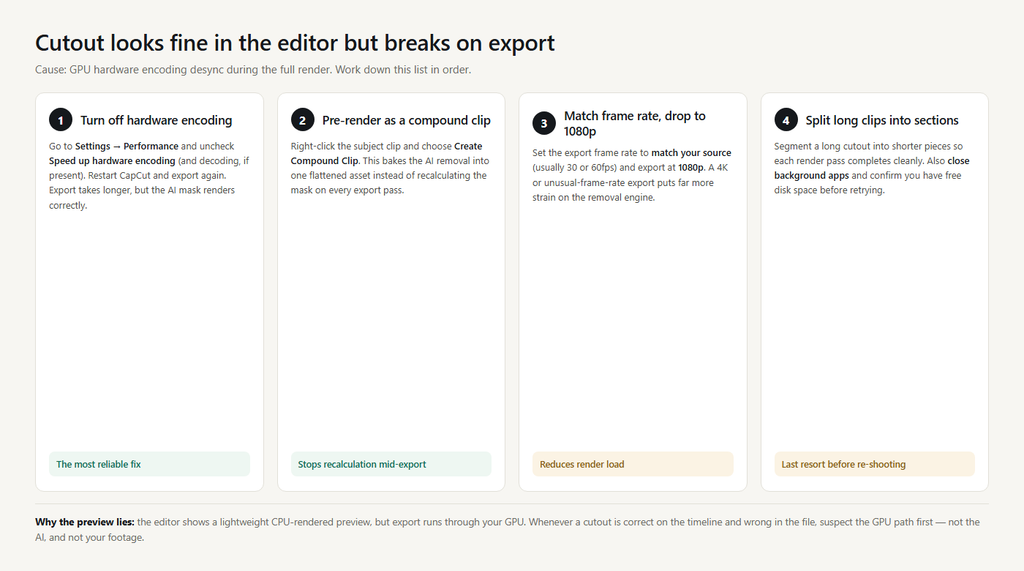
While you’re editing, CapCut renders a lightweight live preview on the CPU. When you export, it shifts to your graphics card and processes the AI cutout mask frame by frame. If the GPU struggles with the mask during a full render, it drops or misplaces frames — so the original background bleeds back through and the subject looks warped.
The fix is to take the GPU out of the equation. Go to Settings → Performance, uncheck Speed up hardware encoding (and hardware decoding if it’s there), restart CapCut, and export again. Export takes longer. The cutout renders correctly.
If that isn’t enough, try these in order:
- Pre-render the cutout. Right-click the subject clip and choose Create Compound Clip. This bakes the AI removal into a single flattened asset instead of recalculating it during export.
- Match your frame rate and drop to 1080p. A 4K or unusual-frame-rate export puts far more strain on the removal engine than 1080p at the source frame rate.
- Split long clips. Segmenting a long cutout into sections keeps each render pass short enough to complete cleanly.
Auto removal vs chroma key: pick the right tool
If you have a real green screen, don’t use auto removal. Chroma key is more predictable whenever the backdrop is an even, properly lit colour — you’re giving the software an exact colour to remove instead of asking a model to guess what’s a person.
Use auto removal for ordinary footage: talking-head clips, social content, anything shot against a real room. Use chroma key when you control the backdrop. Use Custom removal to repair either one.
FAQ
Is CapCut’s background remover free? Auto removal is available in the free version on desktop and in most mobile builds. Some newer AI cutout variants sit behind Pro, and availability shifts between versions — if the option is missing, update and check again.
Why is my cutout flickering between frames? The model is re-evaluating each frame independently, and low-contrast edges flip back and forth. Improve lighting and contrast, or split the clip and re-apply removal to the problem section only.
Does removing the background reduce quality? The cutout itself doesn’t, but aggressive masking plus a mismatched background often looks soft. Shoot at 1080p or higher and match the lighting of your replacement background to your subject.
Can I remove the background from a photo the same way? Yes — the same Remove BG panel handles stills, and image cutouts are generally cleaner than video because there’s no motion between frames.